Creating rules does not change traffic while enforcement is Off. In that state the routed overlay remains an open mesh.
Build the allow set first
Section titled “Build the allow set first”Before the change window, create explicit rules for:
- operator and recovery access;
- every required application flow;
- DNS and management paths that are actually subject to policy;
- AI agents and automation identities; and
- full-tunnel egress behavior where applicable.
Keep console/host access out of band so a policy mistake can be corrected.
Test policy intent
Section titled “Test policy intent”Select Test access on Access Policies.
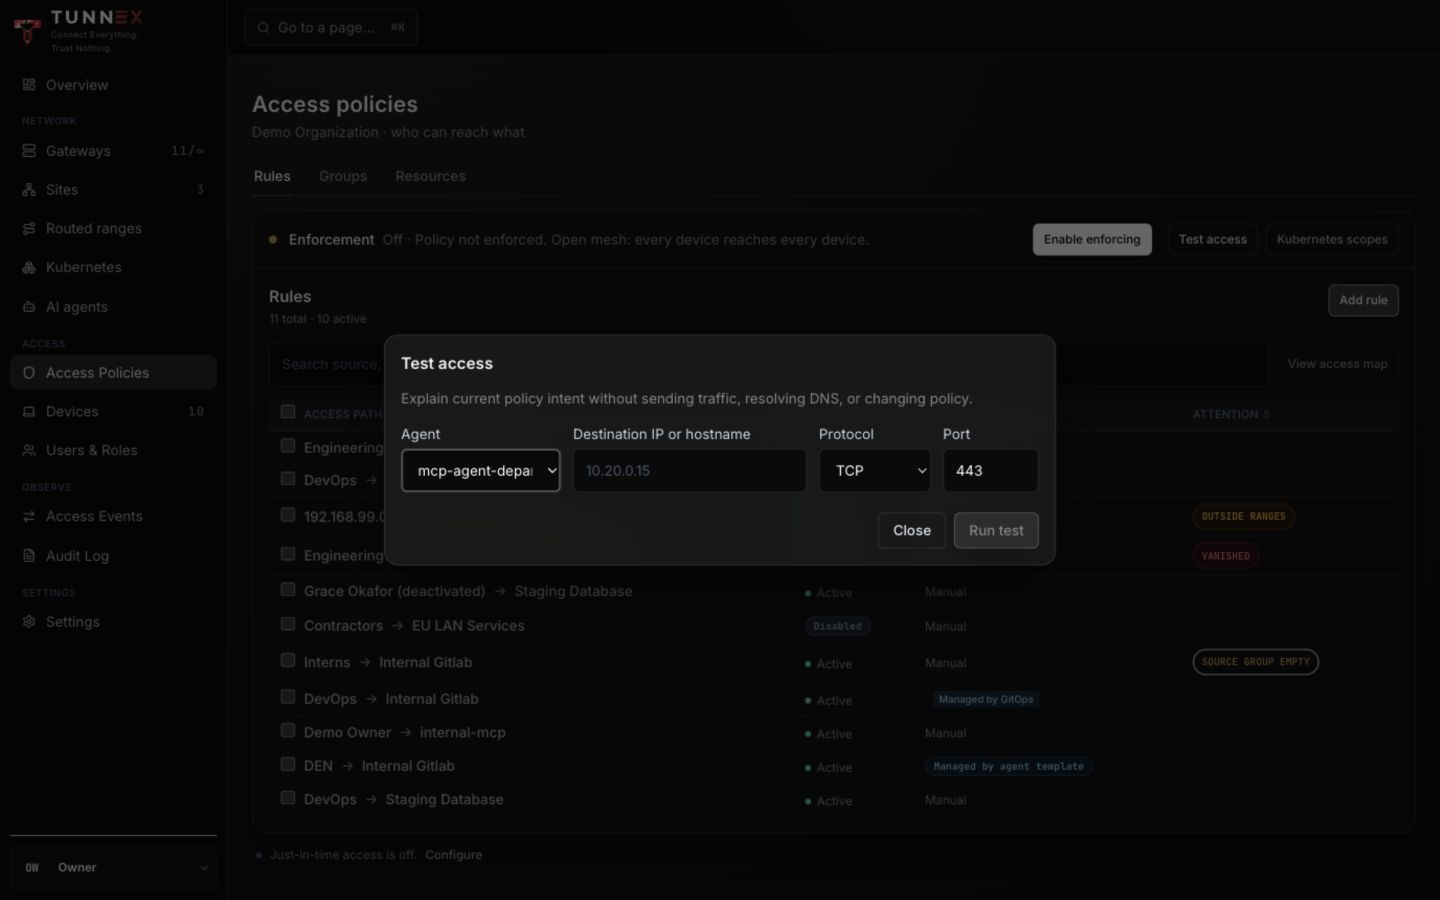
- Choose the Agent or supported source shown by the deployment.
- Enter Destination IP or hostname.
- Choose Protocol.
- Enter Port.
- Select Run test.
The test explains current policy intent. It does not send traffic, resolve DNS, or prove the gateway applied the artifact. Run both an expected-allow and an expected-deny case.
Enable enforcing
Section titled “Enable enforcing”- Confirm an out-of-band host path is working.
- Confirm at least one recovery/operator allow rule.
- Select Enable enforcing.
- Read the server-verified rule count and impact warning.
- Select Enable enforcing in the confirmation only when the impact is expected.
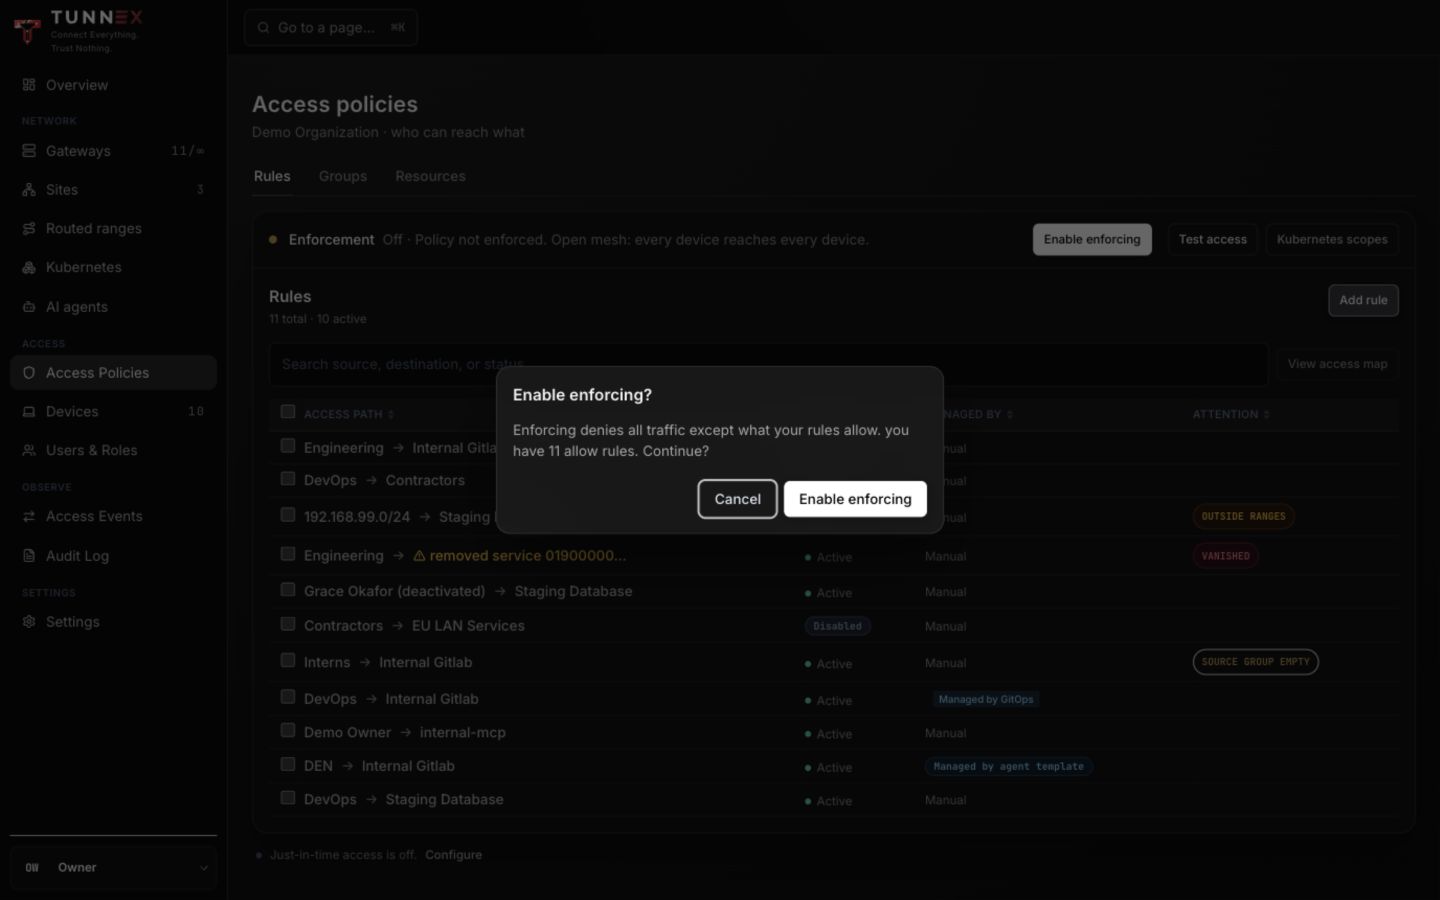
Enforcing denies all traffic except matching allow rules. A zero-rule confirmation is deliberately destructive: it denies every governed flow.
Verify the applied result
Section titled “Verify the applied result”Do not stop at the toggle. Verify all layers:
- Control plane: the organization shows Enforcing.
- Gateway: required gateways report the new policy revision without apply failure.
- Allowed flow: connect to a representative allowed destination/port.
- Denied flow: attempt one intentionally ungranted destination/port.
- Evidence: confirm the allow/deny under Access Events.
nc -vz 10.20.4.5 5432 # expected allowed examplenc -vz 10.20.4.5 22 # expected denied exampleUse addresses/ports from your own approved test plan. A timeout can also mean routing or application failure, so correlate it with the access event.
Device approval and posture
Section titled “Device approval and posture”Open Settings → Access & security to enable Require device approval and the optional Just-in-time agent access feature.
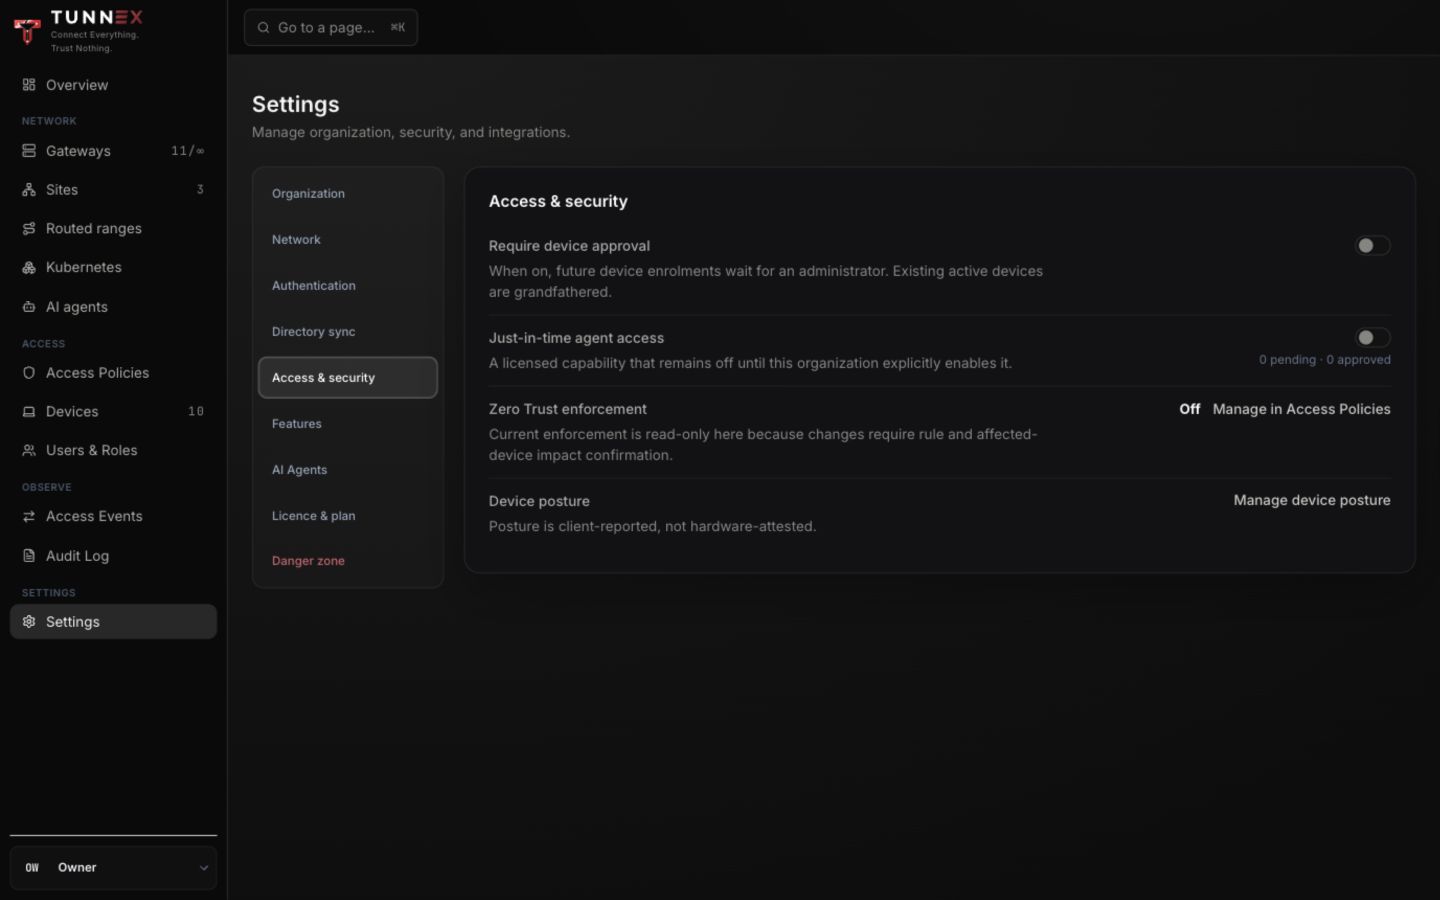
Device approval affects future enrollments; existing active devices remain active. Review new devices under Devices → Approvals.
Posture is configured under Devices → Posture. Only managed macOS and Windows clients report it. Warn keeps access while surfacing noncompliance; Require removes access when a noncompliant managed report is applied. The facts are self-reported, not hardware attestation.
Just-in-time agent access
Section titled “Just-in-time agent access”When enabled:
- Open the just-in-time section in Access Policies.
- Choose Agent and Destination.
- Enter a specific Reason.
- Choose duration: 15 minutes, 1 hour, 4 hours, or 24 hours.
- Select Request access.
- An approver selects Approve or Reject.
- The requester can Cancel while pending; an approver can Revoke an active grant.
- Review History and the audit log.
A pending request creates no rule. An approval creates an ordinary expiring grant. Disabling the feature is blocked while pending or approved requests remain.
Roll back
Section titled “Roll back”If required traffic fails immediately after enforcement:
- Preserve the failed allow/deny evidence.
- Use the out-of-band console path.
- Disable enforcement if the missing access cannot be corrected safely in place.
- Confirm gateways applied the rollback.
- Add/test the missing narrow rule.
- Re-enable enforcement during a new watched change.
Do not broaden a resource to a whole subnet merely to make the incident stop. See Access events and audit for evidence handling.